Property Input Property Stencil
René D. Elms
July 19, 2013

The Property Input property stencil allows the user to display and change an input property directly on the stencil. The variable may be almost any user-definable variable in ProMax, including flow rates, temperatures, energy rates, and even User Defined Variables.
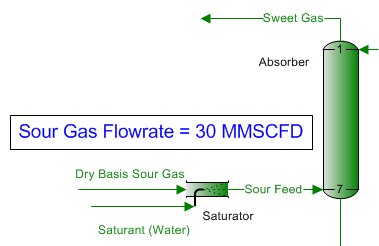
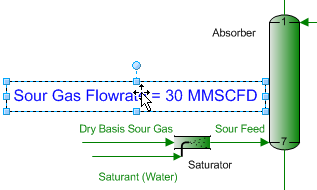
The stencil below is utilized to easily access and change the Sour Gas flow rate entering an amine absorber, for example. This stencil can be very helpful and convenient when the user needs to change inputs frequently. In addition, this capability can come in handy when setting up a model for those who are less familiar with simulation or need to make simple input modifications quickly.
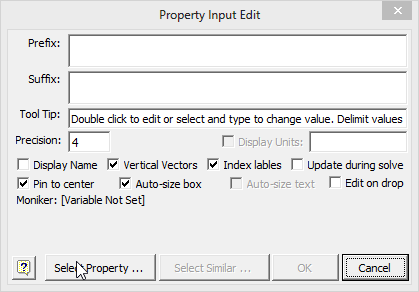
In order to use the stencil, drag and drop it on the flowsheet, then double-click on the stencil to open the Property Input Edit dialog. Next, click on the ‘Select Property’ button at the bottom left of the dialog.
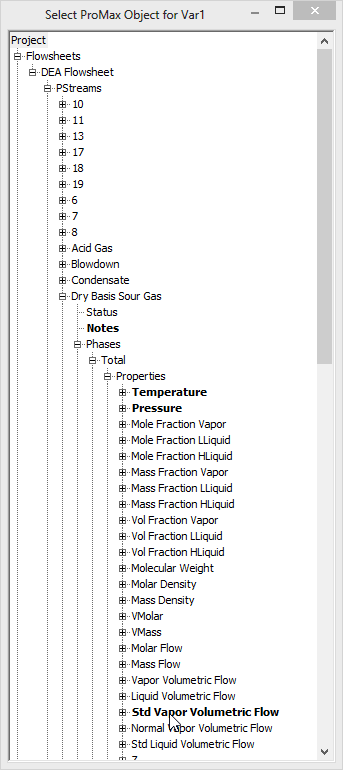
In the navigation tree dialog, find and select the desired input property. For the previous example, it would be the “Std Vapor Volumetric Flow” of the “Dry Basis Sour Gas” PStream, as seen below.
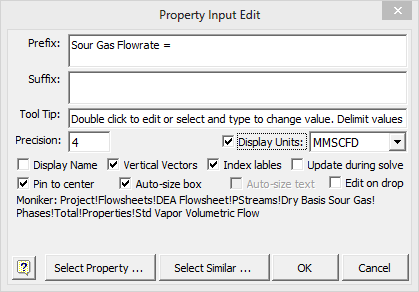
Once the property of interest has been selected, its moniker is displayed in the bottom portion of the Property Input Edit dialog.
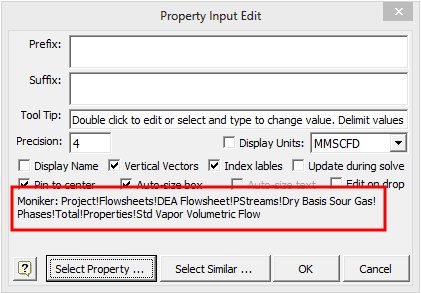
The stencil allows for customization of text prior to and following the numerical value of the chosen property. The Property Input Edit dialog contains fields to enter text that will precede (Prefix:) and follow (Suffix:) the numerical value. Inclusion and selection of the units is also an option via a check box. The dialog corresponding to the example is seen below with a Prefix entry and the Display Units box checked.
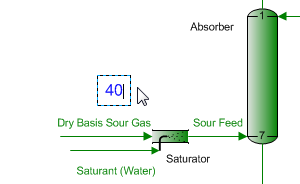
To change the value of the input property, select the stencil and simply type the new value of the property and press ‘enter’.
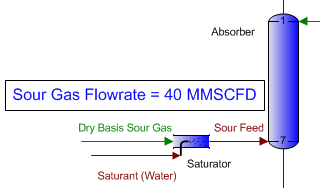
The model is now ready to re-execute with the new input value.
Hint: the font size and properties may be changed by using the Visio functions in the Home Ribbon.